notice
This is documentation for Rasa X Documentation v0.33.x, which is no longer actively maintained.
For up-to-date documentation, see the latest version (1.1.x).
Annotate NLU Examples
Improving your NLU model based on messages from real conversations is a crucial piece of building an assistant that can handle real users. Coming up with examples yourself can help you bootstrap at the beginning of a project, but when you’re going into production, less than 10% of your data should be synthetic.
In preparing for production, you should have already shared your bot with guest testers or other internal users. Looking through the messages from guest testers is key to building out your own examples to correctly respond to users who don’t know the inner workings of your assistant and what it can do.
Once your assistant is in production, annotating incoming messages can have an even bigger impact on your assistant’s success, as the messages are from actual end users. Annotating these users’ messages is a great way to understand your bot’s successes and failures and add data that reflects what real users say to your assistant.
Annotating in the NLU Inbox
The NLU Inbox is a collection of all of the messages users have sent that aren’t already part of your training data. Whenever you get new messages, a badge in the sidebar will indicate that you have new data to process. Processing this inbox is the fastest way to improve your assistant’s NLU model.
Annotating User Messages
As messages from users come in, they will appear in the NLU inbox alongside the predicted intent and confidence of the prediction. Hovering over any entry brings up the Mark Correct and Delete icons. If a message’s prediction is correct, you can save it to your training data directly by selecting Mark Correct.

If the predicted intent is incorrect, select a different intent from the drop-down menu. If necessary, you can create a new intent by scrolling to Create new intent in the drop-down. Save the new prediction with the Mark Correct button.
If for some reason you do not want a user’s message saved to your training data (for example, you may not want to save personally identifiable information (PII) into your dataset), use the Delete button to remove the entry from the inbox.
Annotating in Bulk
Once you are comfortable annotating NLU data by correcting predictions and marking correct ones, you can speed up your annotation workflow by making use of some helpful features:
Keyboard Shortcuts
The NLU Inbox is supported by keyboard shortcuts which help you save and delete messages
with less clicking. To select the initial message, push the j key. You can then
use the following keyboard shortcuts to interact with the NLU Inbox:
j: select the next messagek: select the previous messages: save the selected message (mark correct)d: delete the selected message
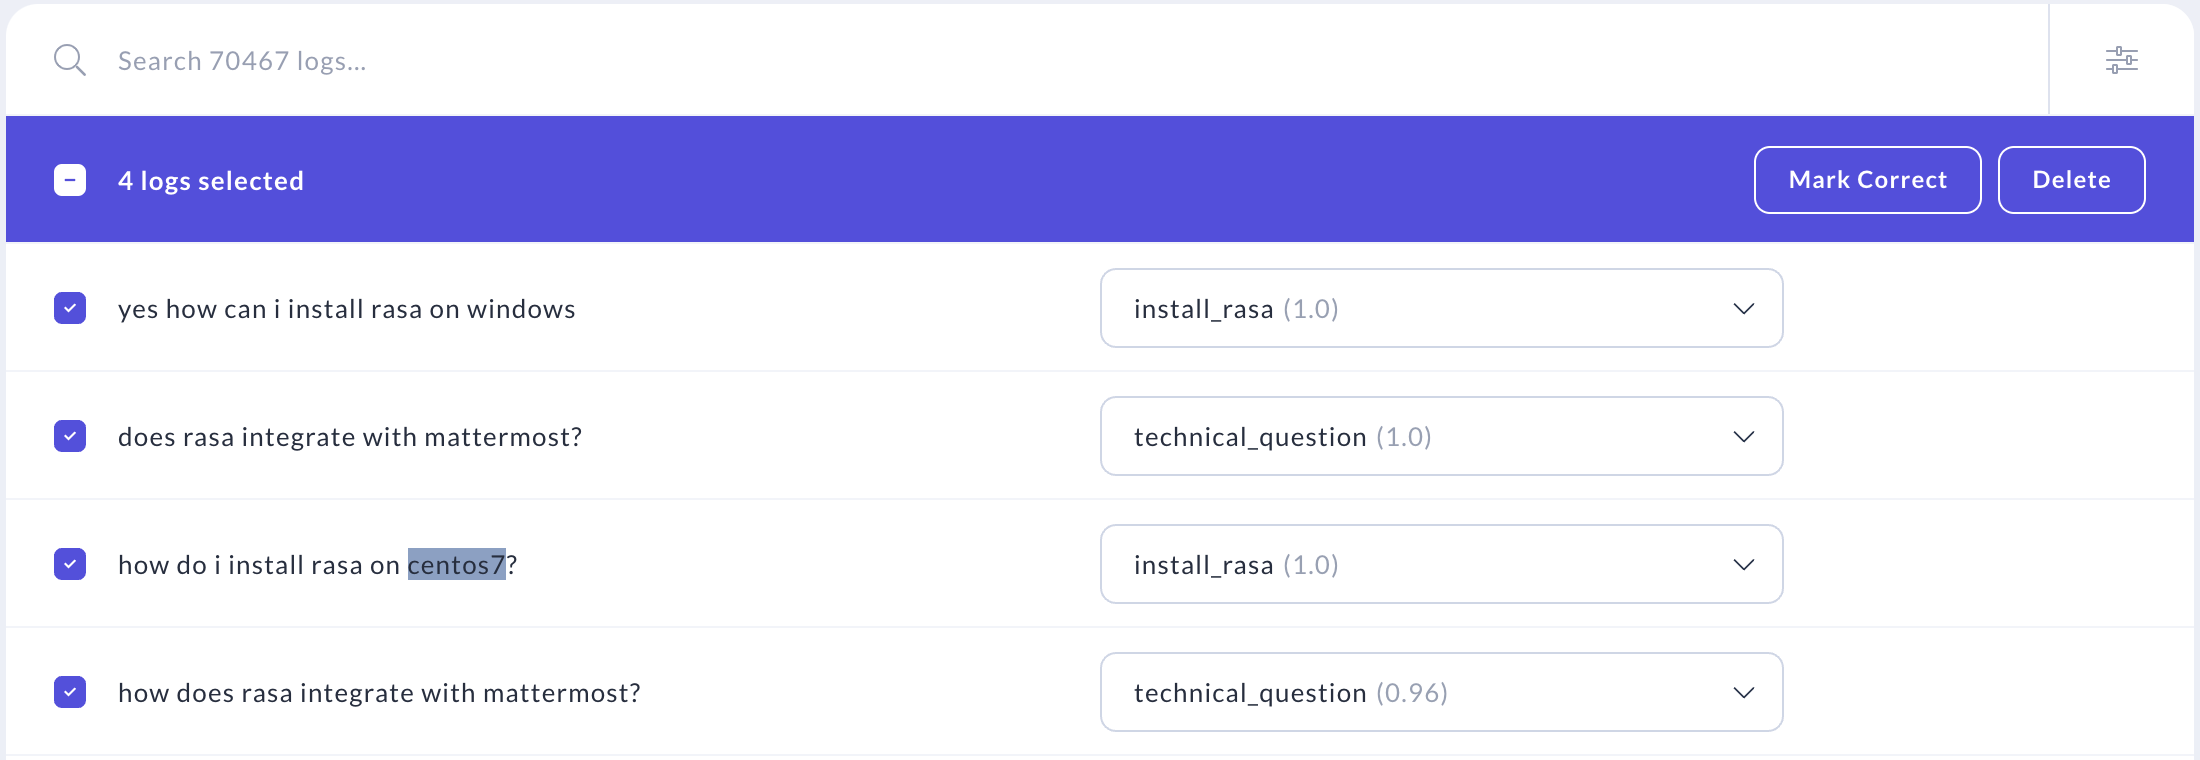
Bulk Actions
You can also use the select boxes next to each message to bulk annotate messages. To do so, select multiple messages that you would like to mark correct or delete. A header will appear that shows you how many messages you have selected and has buttons for bulk actions. Click either of the purple buttons in the header bar to mark all of your selections as correct or delete them.
Annotating in Conversations
While you’re reviewing conversations or fixing problems, you may notice an incorrect NLU prediction in a conversation. Instead of finding and fixing that prediction in the NLU Inbox, you can annotate it directly from the conversations page.
Select the incorrectly predicted message to bring up the annotation pane on the right-hand side. You’ll see a drop-down menu similar to the one in the NLU Inbox where the predicted intent is selected. Choose the correct intent from the drop-down and push the Save button to correct the intent.
